Thursday, April 26, 2007

Pantry Cooking, part 2, or Ye Olde Bacardi Rum Cake


Like many food bloggers, I bake from scratch. At least 99.999% of the time. The other .001%, I use a little help. I am not a snob, except perhaps when it comes to Parmigiano Reggiano. Oh, okay, I'm a snob when it comes to that.
Enter, the tried and true Bacardi Rum Cake. I have been making this cake for over 30 years, having learned to make it at my mum's knee. Her nickname for it was "sliver cake" - you have "just a little sliver," again and again, until you realize you've eaten half the cake. Every time I make it, someone asks me for the recipe, even avowed non-bakers. That's how good this is.
This cake keeps wonderfully, and freezes equally well - if there is any cake left over to freeze, that is!
Bacardi Rum Cake
Cake
1 cup chopped pecans or walnuts
1 18-1/2 ounce yellow cake mix (my mom and I prefer Duncan Hines brand)
1 1-3/4 ounce (4-serving size) instant vanilla pudding mix
4 eggs
1/2 cup cold milk, water, or half-and-half
1/2 cup vegetable oil, or melted butter (I always use butter)
1/2 cup Barcardi dark rum
Glaze
1 stick butter
1/4 cup water
1 cup sugar
1/2 cup dark Barcardi rum
Cake:
Preheat oven to 325 degrees F. Grease and flour 12-cup Bundt pan (this step is very important, or you will have trouble getting the cake out. Baking sprays work very well). Sprinkle nuts on bottom of pan. Combine all cake ingredients in a mixing bowl. Beat for 2 minutes on high with electric mixer. Pour into prepared pan. Bake for 1 hour, or until cake separates from sides of plan and a testing skewer inserted in the middle comes out clean.
Cool in pan for about 15 minutes. Invert cake onto serving plate. Prick top with a skewer. Drizzle glaze (see below) slowly over top of cake, allowing it to soak in between applications. Use brush or spoon to put extra dripping back on cake.
Glaze:
Melt butter in saucepan. Stir in water and sugar. Boil 5 minutes, stirring constantly. Remove from heat and stir in rum.

Monday, April 23, 2007

Pantry Cooking

Hhhm, what to cook for dinner, since I haven't made it to the grocery store?

What's in the cupboard? Eggs. Cheese. Milk. And a secret ingredient that makes so many things taste better. Shhh . . . it's anchovies. Even if you don't like them (like me), they add an amazing depth of flavor to tomato sauces and souffles. They simply melt in and lose their anchovy taste.
I had some cheddar cheese that wasn't sharp enough for my tastes, so I decided to use it up in a souffle, and jazzed it up with some of those little fishies. I must say, the smell of this little golden marvel filled the house and wafted outdoors, much to the delight of Master Chow when he came home. "What is that?" he inquired. He soon found out. Just add a nice salad, and enjoy!


Cheese Souffle
Adapted from a recipe by Alton Brown
  • 2 tablespoons grated Parmesan
  • Butter, room temperature, to grease souffle dish
  • 1 1/2 ounces (3 tablespoons) butter
  • 3 tablespoons flour
  • 1 teaspoon dry mustard
  • 1/2 teaspoon garlic powder
  • 1/8 teaspoon kosher salt
  • 3 anchovy filets, packed in olive oil, minced
  • 1 1/3 cups milk, hot
  • 4 large egg yolks
  • 6 ounces sharp Cheddar cheese, grated
  • 5 egg whites plus 1 tablespoon water
  • 1/2 teaspoon cream of tartar

    Grease an 8-inch souffle mold with the room temperature butter. Add the grated Parmesan and roll around the mold to cover the sides. Cover with plastic wrap and place into the freezer for 5 minutes.

    Preheat oven to 375 degrees F.

    In a medium bowl combine the flour, dry mustard, garlic powder, and kosher salt. Set aside. In a small saucepan, heat the butter. When the butter has stopped foaming, turn down the heat and add the anchovies, stirring them in. Whisk the flour mixture into the melted butter and anchovy mixture. Cook for 2 minutes. Monitor the heat because you don't want this to burn, or you will have a rather nasty mess on your hands.

    Whisk in the hot milk and turn the heat to high. Once the mixture reaches a boil, remove from the heat. In a separate bowl, beat the egg yolks to a creamy consistency. Temper the yolks into the milk mixture, constantly whisking. Remove from the heat and add the cheese. Whisk until incorporated. In a separate bowl, using a stand or hand mixer, whip the egg whites and cream of tartar until glossy and firm. Start by whipping the whites on a low speed until they start to foam, and then increase the speed. Be careful - if you overbeat the whites, they will be unusable.

    Add 1/4 of the egg white mixture to the cheese base. Continue to add the whites by thirds, folding very gently. Pour the mixture into the souffle. Fill the souffle to 1/2-inch from the top. If you like, run a damp finger along the inside of the rim to give the souffle a "hat-like" appearance.

    Place on an aluminum pie pan. Bake in the oven for 35 minutes.

Monday, April 16, 2007

IACP Winners Announced

Thursday, April 12, 2007

Butternut Squash Lasagna

I was apprehensive to give this a try, but it looked so good! And the Chow household is glad that I did, as it is now on the repeat list.

We love butternut squash. However, I am not a fan of most lasagnas - too much cheese (yes, there is such a thing), and acidic tomato sauces. So, I decided to combine and tweak two recipes from the Food Network, one by Giada De Laurentiis, and the other by Michael Chiarello.

I was pleasantly surprised at how the flavors melded; not one thing stood out more than anything else. There are a few key things to remember when you make this. First, season the major components as you go along, or you could easily end up with an unpalatable mass. Second, use herbs and spices that you like. Third, think twice about using no-boil noodles; a reviewer of one of the aforementioned recipes warned that the starch overwhelmed the delicate flavor of the squash. Finally, you can cook the squash in advance and freeze it for a couple of weeks, before thawing and using it in the recipe.

The lasagna freezes very well, so you can put it together in advance, freeze it, and pop it in the oven on the day you plan to use it. If you do that, I recommend pulling it out of the freezer at least 4 to 5 hours before you plan to eat. Let the lasagna sit at room temperature for about two hours. Preheat the oven to 350 F and bake at that temperature for two hours, covered with foil. Why so long at this temperature? So that the center warms up - I can't tell you how many times I've made a frozen lasagna, and the middle is still stone cold!

Turn the oven temperature up to 375 F and remove the foil. Cook for another 45 minutes, or until cheese is golden, melted, and bubbly. Another thing I don't like about most lasagnas is burned mozzarella cheese on top. Blech. Cooking it this way avoids that problem, as well.

Now, on to the recipe!

Butternut Squash Lasagna
Roasting the Squash
  • 2 large butternut squash, about 4 to 5 pounds (I actually used a combination of kabocha and butternut)
  • 1/4 cup water (more, if needed)

Preheat the oven to 400 degrees F. Cut the squash in half lengthwise, and scoop the seeds out with a spoon. Place the squash face down on a rimmed baking sheet (you may need more than one). Place the baking sheet in the oven, and pour about 1/4 cup water in the pan to prevent burning. Roast the squash in the oven until very soft and beginning to brown, 40 to 50 minutes, stirring once or twice.

Remove squash from oven and let cool until you can handle it comfortably. Scoop out the flesh into a large bowl and allow to cool. At this point, you can continue, or freeze the squash for later use.

Preparing the Squash Mixture

  • 14 fresh sage leaves, finely chopped
  • 1 Tablespoon finely chopped fresh thyme
  • 1 to 2 inch sprig of fresh rosemary, leaves removed and finely chopped
  • 1/4 teaspoon almond extract
  • 2 teaspoons salt
  • 1/2 teaspoon freshly ground black pepper
  • 1 teaspoon freshly grated nutmeg
  • 1 cup ricotta cheese (low fat is OK)
  • 1/3 cup freshly grated Parmesan cheese (Parmigiano Reggiano is best)
  • 1 large egg

Have a large mixing bowl standing by. Puree the squash in a food processor (you may have to do that in batches), and put it in the mixing bowl. When you puree the first bit of squash, add the sage, thyme, rosemary, almond extract, salt, pepper, and nutmeg. After you have combined all the pureed squash, taste the mixture and adjust the seasonings. After you have done this, mix in the egg, and the ricotta and Parmesan cheeses. Set aside.

Making the Bechamel (white sauce)

  • 6 cups whole milk (2% is fine, but do not use nonfat, or sauce will not thicken properly)
  • 4 tablespoons unsalted butter
  • 1/4 cup all-purpose flour
  • 1/2 teaspoon freshly grated nutmeg
  • 1/4 teaspoon allspice
  • 2 teaspoons salt
  • Freshly ground black pepper

In a large saucepan, bring the milk to a slow simmer over medium heat. In a large pot, melt the butter over medium-low heat. Add the flour and stir. Add about 3 cups of the milk, and whisk vigorously to prevent lumps. Bring to a boil, while whisking continuously. Add the remaining milk and whisk again. Add the salt, pepper, allspice, and nutmeg. Adjust the heat to low to maintain a slow simmer, and cook until the sauce coats the back of a spoon, about 5 minutes, whisking frequently. Remove the saucepan from the heat. Makes about 8 cups.

Preparing the Lasagna Noodles

  • 12-15 lasagna noodles, each 6 1/2 by 3 inches
  • 1 Tablespoon kosher salt (important, or your lasagna will suffer in the flavor department)
  • extra-virgin olive oil

In a large pot of boiling, salted water, cook the lasagna sheets until they are slightly undercooked. In my case, the package said to cook for 10 minutes, so I cooked them for 7 to 8 minutes. Drain the sheets and spread them on a baking sheet. Drizzle them lightly with olive oil and set aside.

Putting Together the Lasagna

  • 2-3 cups of mozzarella, grated (if you put it in the freezer for 30 minutes, it will be easier to grate) Use 3 cups if you like lasagna really cheesy.
  • 1 cup of grated Parmesan cheese

Preheat the oven to 375 degrees F. Butter a 9 by 13-inch baking dish. Spoon a ladle of bechamel into the dish and spread to coat the bottom. Place a single layer of lasagna sheets on top of the bechamel. Spread some of the squash mixture evenly over the lasagna sheets and sprinkle about 2 tablespoons of mozzarella cheese and 1 tablespoon of grated Parmesan on top. Repeat this step until all ingredients are used, using 1 to 2 ladles of bechamel for each layer. You should end up with 3 to 4 layers, depending on how you divide your ingredients per layer. Keep building the layers until the pan is full, to about 1/4-inch from the top. Finish with sauce, and cheeses directly over the last layer of noodles.

Cover lasagna with foil. Place pan on a rimmed baking sheet, and bake in the middle of the oven for about 1 hour. Remove the cover, and continue cooking for another 15 minutes until golden brown and bubbling. Allow lasagna to rest before slicing. Serve warm.

More Signs of Spring

Red Amaryllis

Tuesday, April 10, 2007

Thoughts on Food and Life

This morning, my uncle passed away, at home with his daughter, just as he wanted. He was an adventurous rascal who fought in the South Pacific during World War, moved to Alaska in the late 1940s, and welcomed friends and strangers into his home. He died of mesothelioma, an asbestos lung cancer. He is the fifth family member to be diagnosed with cancer in the past eight years, and the fourth to succumb to it. So, as you can see, I am so glad that Chris at Mele Cotte posted the recipes today for the first ever Cooking to Combat Cancer event.

My uncle lived a full life. And he loved food. On a remote island in Alaska, he had one of the most amazing pantries one can imagine; among the canned venison and salmon, tucked behind those tins of beans, he had palm sugar, hum ha (shrimp paste), and capers. He was opinionated, and thought the food and exercise obsessions of those who lived in "the lower forty-eight" were ridiculous.

He may have had a point. One of the things that I've been realizing for a while now is how much guilt we have when it comes to food. Think about it: meat eaters are criticized by vegeterians. People who believe in "slow-food only" criticize those who would dare use a cake mix once in while. Vegans and vegetarians are often treated like the dotty old aunt in the attic. Low fat, low carb, Atkins, Zone, South Beach. Eggs are bad, eggs are good.

Life is so short. We live in a time when we have so many wonderful food choices. We should try, I believe, to eat healthily as much as possible, but one of the things I learned from my uncle, who lived to 87, is to eat with joy, and love what you eat. The attitude with which you eat may be just as important as what you put in your mouth. As a friend of mine recently said, "I'm sure I've eaten a donut or two that were actually healthy for me!"

I just had a piece of homemade rum cake. I will follow it with some Swiss chard and broccoli tonight, along with some tofu. These are my choices today, and I am happy with them. I can just picture my uncle smiling down at me, and praising me. Not for the chard, or the tofu. But for the rum cake.

Saturday before Easter in the D.C. Area

Snow!

Monday, April 09, 2007

Blogger News Roundup

  • Mouthwatering Meyer Lemon and Ricotta Pancakes over at My Husband Cooks.
  • Baking Bites (formerly Baking Sheet) reports that the FDA is considering changing the definition of chocolate, thereby lowering current standards. Perhaps they should concern themselves with more pressing issues, like contaminated food?
  • A guide on How to Freeze Anything, via Slashfood.
  • Becks and Posh's hilarious Easter entry, revisited.
  • **Updates**
  • Freya orders a pig's head, and details her Easter cooking.
  • I discover a blog: An Italian in the US, and drool over the Torta Pasqualina. Yum.

Human Foods that You Should not Feed to Your Dog

Include alcohol, chocolate, macadamia nuts, avocado, coffee, tea, onions, raisins, and grapes. Much more here, and this list includes foods that you should not feed to cats.

Beer Batter Bread

Last Christmas, we bought some Sam Adams Light beer for dinner guests. Because Master Chow and I do not like beer, five bottles have been sitting in our basement since December. What to do?


Beth Hensperger and Beer Batter Bread, to the rescue. Master Chow loved this! The taste of the beer that you use really comes through, so pick one that you like. I added 1/4 teaspoon of cayenne to the batter, and even for me (I don't like a lot of heat in food) that wasn't quite enough, so you may want to eliminate it, increase it, or substitute other herbs. Dill and caraway might be a nice combination, or rosemary.

The bread is best the day it is baked, but I froze some and it was wonderful, toasted with butter, a few days later.

Beer Batter Bread
  • 3 cups (15 oz./470 g) unbleached all-purpose flour
  • 3 Tablespoons firmly packed light brown sugar
  • 1 Tablespoon baking powder
  • 1 teaspoon salt
  • 1/4 teaspoon powdered cayenne pepper
  • 1 bottle (12 fl. oz./ 375 ml) beer, unopened and at room temperature
  • 4 Tablespoons unsalted butter, melted, plus extra for greasing the pan

Preheat the oven to 375 F, and grease a 9-by-5 inch loaf pan. Place a rimmed baking sheet in the oven, on the middle rack, while you prepare the batter.

In a large bowl, mix together the dry ingredients. Open the beer and add it all at once - it will foam up, so be sure to use a large bowl. Stir briskly just until ingredients are combined, about 2o strokes. The batter should be slightly lumpy and thick. Pour into loaf pan, and drizzle with the melted butter.

Place the loaf pan on the baking sheet in the oven. Bake about 35-40 minutes, or until the top is golden brown and crusty, and a cake tester inserted in the middle comes out clean. Let loaf rest about 5 minutes before turning out onto a cooling rack.

Enjoy with plenty of butter, or plain.

Thursday, April 05, 2007

Cooking to Combat Cancer - Healthy Braised Kale


This is my entry for Chris's first Cooking to Combat Cancer event! Actually, this is my first entry to any food blog event, ever.

I picked a quick and easy kale recipe that I often make. Kale is a cruciferous vegetable (along with broccoli, Brussels sprouts, and cauliflower) that is high in calcium and other cancer-fighting ingredients. Kale is also loaded with vitamin A, vitamin C, vitamin E, manganese, fiber, copper, vitamin B6 and potassium.
"As a member of the Brassica genus of foods, kale is a great food if you're looking to sustain your health and enjoy a delicious food at the same time. It's the organosulfur compounds in this food that have been main subject of phytonutrient research, and these include the glucosinolates and the methyl cysteine sulfoxides. Although there are over 100 different glucosinolates in plants, only 10-15 are present in kale and other Brassicas. Yet these 10-15 glucosinolates appear able to lessen the occurrence of a wide variety of cancers, including breast and ovarian cancers." Source.
Choose kale with green unblemished leaves. You'll have an easier time prepping the vegetable if you find stalks with large leaves, but anything is fine as long as it is fresh and in good shape.
Healthy and Simple Braised Kale
2 pounds of kale, trimmed of stalks and coarsely chopped
1-2 Tablespoons extra virgin olive oil
1/8 to 1/4 teaspoon dried red pepper flakes (I use the lesser amount)
1 garlic clove, crushed or minced
2-4 Tablespoons red wine vinegar
coarse salt and freshly ground pepper to taste
1 fresh tomato, diced
grated Parmigiano Reggiano to taste (I use about 2-3 Tablespoons)

Prepping the kale
Wash thoroughly - kale can be sandy. Do not dry, simply shake out the stalks. The water left on the leaves with help them braise. Tear the leaves off the stalks and set aside.
Braising
In a large pan with a lid (I use my wok), gently heat the olive oil and red pepper flakes on medium heat. When the oil starts to sizzle gently, add the garlic followed immediately by the kale. You don't want the garlic to burn! Using tongs or large spoons, toss the kale to coat it with the olive oil mixture. Add the red wine vinegar - the amount will depend on your personal tastes, the kale, etc. Start with two tablespoons, and at more near the end if you feel the kale needs it. Add salt and pepper.
Turn heat down to low and put lid on pot. Braise gently for about 15-20 minutes, turning the kale gently now and then. If you are using young kale, it will braise more quickly than older, larger leaves.
Kale should be tender but not mushy. Shut the heat off. Mix in the parmigiano reggiano. Add the diced tomatoes, and put the lid back on for about 5 minutes. The residual heat will melt the cheese.
Enjoy, knowing you are eating a super vegetable!

My Meyer Lemon Tree

More blossoms than ever before!

Then there's my poor kaffir lime tree, which experienced a bad case of leaf drop:

Tuesday, April 03, 2007

Blogger Problems

I was fiddling with my template, and all of my links to other sites just disappeared! It wasn't on purpose, so please be patient while I reconstruct everything. I'm better at cooking than I am at this kind of stuff. Daisy is wondering what I'm up to:

Cinnamon Rolls


It had been a while since I baked with yeast - years, in fact. And I grew helping my mom mill her own wheat flour, and bake whole wheat loaves. Every Sunday, we had homemade pizza with tomato sauce canned from our own tomatoes. So, how can someone with that background develop a Fear of Yeast?

Stop baking with it for a while.

Needless to say, I was determined to get back on that horse. Inspired by Ivonne's recent creation, I girded my loins and hit the kitchen this past weekend. Armed with Margaux Sky's Beautiful Breads and Fabulous Fillings: The Best Sandwiches in America, I decided to bake some cinnamon rolls, which I'd never made before.

Both Ari, of Baking and Books, and Ivonne have used some of the book's recipes, and warned that the amount of flour the recipes called for could be off. They were right. Another reason to love the culinary blogosphere - you get reports back from the trenches.

So, I started baking. I cleared off the kitchen counter. I set out my ingredients, and got to work. And then . . . I ran out of flour. No problem, I thought, I'll just go down to the freezer and check my back stock. Among the rice flour, garbanzo flour, spelt flour, etc., I found . . . pastry flour. Which you don't use to make bread.

What the heck, I thought, there are times to live dangerously, and this is one of those times. Never mind that my freshly bought yeast wasn't bubbling, either. I ended up using 7 cups of all-purpose flour, and 4 cups of pastry flour.

I thoroughly enjoyed kneading the dough. Working dough by hand gives me a feeling of being connected to the earth. I think of women doing exactly the same thing, for thousands of years. It's a zen experience. I kneaded for about 10 minutes instead of the 4 stated in the recipe, partly because I enjoyed it, but mostly because I was trying to develop as much gluten as possible in the pastry flour.

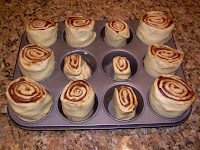
After I rolled up the dough (the wrong way, but it didn't really matter in the end), I had an oddly shaped log, which I then cut up. I filled the muffin cups and put them in the refrigerator to rise overnight. The next morning, while they baked, I made the glaze, which I adjusted in terms of liquid and flavorings, otherwise I would have ended up with a thin, watery, and tasteless glaze.

Our thoughts? These were easy to make, and pretty tasty. Some of them were huge - 3 inches across! The insides were moist and fully cooked. On the downside, Master Chow and I both thought that the dough lacked depth of flavor. I don't know if this was due to my pastry flour incident or not, but I'd like to make them again using the correct flour. And even though I used this cinnamon, they didn't have a strong enough cinnamon flavor. My favorite part was the orange glaze I made for them, which had a nice, intense taste.

Would I make them again? Yes, but I'm going to continue my quest for the ultimate cinnamon roll. So many recipes, so little time! I'd better get cracking.

Oh, and yesterday, while I was digging through the freezer, guess what I found? A new, unopened bag of all-purpose King Arthur Flour. ARGH!
Sweet Dough
  • 1 Tablespoon yeast
  • 2 cups warm water
  • 1 cup warm milk
  • 1 cup heavy cream
  • 1 cup (2 sticks) of butter
  • 1/2 cup sugar
  • 4 eggs, beaten
  • 1 teaspoon vanilla extract
  • 12 cups all-purpose flour (Note - this is an approximation - stop at around 9 cups and feel the dough. Keep adding flour until the dough loses most of its stickiness but not all of it. Remember, you're going to be adding more flour when you knead the dough. I used 11 cups of flour, total.)
  • 1/8 teaspoon salt

Put the water and milk in large bowl. Dissolve the yeast in the mixture. Add the cream. Let stand until foamy. The recipe says about five minutes, but mine took almost 20. If you are using yeast well within the expiration date, don't worry and be patient.

Generously grease a large bowl, and a muffin tin. Set the tin aside. Add the butter, sugar, eggs, and vanilla to the yeast mixture.

Slowly add the flour and salt to the wet ingredients (see Note above). Place the dough on a floured counter top and knead for 5 to 10 minutes.

Place the dough in the prepared bowl, cover with plastic wrap, and place in a warm, dry place to rise for about 1 hour. Rose Levy Berenbaum suggest letting dough rise in a cold oven (make sure the oven is off!) with only the interior light turned on, and this has worked well for me.

Punch dough down and separate into two portions. You will be using one portion to make the cinnamon rolls, and you can reserve the other in the refrigerator for later use.

Cinnamon Rolls

  • 1 portion Sweet Dough
  • 4 tablespoons all purpose flour
  • 1 cup (2 sticks) of butter, melted
  • 2 cups packed brown sugar
  • 3 Tablespoons cinnamon

Icing

  • 4 cups powdered sugar, sifted
  • 2/3 cup half-and-half or cream, or any combination thereof
  • 1/3 cup orange juice
  • zest of one orange
  • 4 drops of orange oil

Make sure your oven is empty (heh, heh, that's another story). Place rack in middle of the oven and preheat oven to 375 F.

You will need a lot of room to roll out the dough. Sprinkle a counter top with flour, and roll out the dough into a rectangular shape. The dough should be slightly thicker than a sheet of paper, and the long side of the rectangle should be perpendicular to your body.

In a large bowl, combine the melted butter, brown sugar, and cinnamon. Mix well.

Spread the cinnamon mixture over the rolled out dough, and spread it to the edges.

The short side of the dough should be parallel to you. Tightly roll the dough away from you, forming a loaf. Fold the outer edges in as you roll, to hold the filling in.

Cut into 9-12 cinnamon rolls. Place them in the greased muffin cups. I had a couple midget rolls, so I put them in the middle cups so they would not burn before the larger ones finished cooking. Place the muffin tin on a baking sheet with an edge, like a jelly roll pan. This is essential, or you will have a big mess in your oven. The muffins rise a lot, and ooze everywhere.

Bake for 15-20 minutes - keep an eye on the rolls. Remove rolls immediately from tins and place on a plate.

While they are baking, you can make the glaze, which involves mixes together all the glaze ingredients. Add the half-and-half/cream and juice slowly to the powdered sugar, until the glaze reaches a consistency that you like. You may use less liquid than I did.

If you glaze the rolls immediately, they will absorb the mixture and just look shiny, so wait for them to cool a bit if you want a white, icing-like look. Enjoy!